Food scraps. They’re an unavoidable part of cooking, but did you know they don’t have to end up in a landfill? Composting is a fantastic way to transform your kitchen waste into a nutrient-rich soil amendment for your garden, houseplants, or community green spaces. If you’re new to the idea, this composting for beginners kitchen guide is for you. We’ll break down the basics and show you that yes, you can compost even if you’re short on space!
Diverting food waste from landfills is a cornerstone of an eco friendly kitchen. When organic matter decomposes in landfills, it does so anaerobically (without oxygen), producing methane – a potent greenhouse gas. Composting, on the other hand, is an aerobic process that recycles nutrients and reduces your carbon footprint.
(Ready to learn more about reducing overall kitchen waste? Check out our main guide: “The Ultimate Guide to an Eco-Friendly Kitchen (for Beginners & Families)” and our tips on “15 Easy Eco-Friendly Kitchen Swaps to Reduce Waste Today“.)
Why Start Composting Your Kitchen Scraps?
- Reduces Landfill Waste: A significant portion of household trash is compostable organic material.
- Creates “Black Gold”: Compost enriches soil, improves its structure, helps retain moisture, and reduces the need for chemical fertilizers.
- Lowers Your Carbon Footprint: By preventing methane emissions from landfills.
- Closes the Loop: Turns waste into a valuable resource.
- Educational & Rewarding: It’s a great way to connect with natural processes.
What Can You Compost from Your Kitchen?
Think of your compost as needing a balance of “greens” (nitrogen-rich) and “browns” (carbon-rich).
“Greens” (Nitrogen-Rich) from the Kitchen:
- Fruit and vegetable scraps (peels, cores, trimmings)
- Coffee grounds and paper filters
- Tea bags (ensure they’re plastic-free; remove staples)
- Plate scrapings (no meat, dairy, or oily foods – see below)
- Old bread and grains (in moderation, can attract pests if too much)
- Cooked plain pasta or rice (in moderation)
“Browns” (Carbon-Rich) – Often from outside the kitchen, but essential:
- Dry leaves
- Shredded newspaper or cardboard (non-glossy, no colored inks if possible)
- Straw or hay
- Wood chips or sawdust (from untreated wood)
- Dried grass clippings (use sparingly to avoid matting)
What NOT to Compost (Especially for Beginners & Small Systems):
- Meat and Fish Scraps: Can attract pests and create odors.
- Dairy Products (Milk, Cheese, Yogurt): Attract pests and cause odors.
- Oily or Greasy Foods: Can disrupt moisture balance and attract pests.
- Pet Waste (Dog or Cat Feces): Can contain harmful pathogens.
- Diseased Plants: Can spread diseases to your compost and future plants.
- Chemically Treated Wood or Plants: Pesticides and herbicides can contaminate your compost.
- Persistent Weeds (like ivy or bindweed): May survive composting and spread.
- Large Branches or Twigs: Take too long to break down unless chipped.
- Coal or Charcoal Ash: Can contain harmful substances.
Composting Methods for Beginners (Including Small Spaces):
The best method for you will depend on your space, how much waste you generate, and how hands-on you want to be.
- Outdoor Compost Bin/Pile (If you have yard space):
- How it works: Layer greens and browns in a designated bin or pile. Keep it moist (like a wrung-out sponge) and turn it occasionally to aerate.
- Pros: Can handle larger volumes, relatively low-cost to start (DIY options).
- Cons: Requires outdoor space, can sometimes attract pests if not managed well.
- Getting started: Choose a shady spot. Start with a layer of browns. Add greens as you collect them, always covering with a layer of browns to deter pests and manage odors.
- Tumbler Composter (Good for smaller yards/patios):
- How it works: An enclosed drum that sits on a frame and can be rotated. You add materials, seal it, and turn it regularly.
- Pros: Enclosed (less pest risk), easier to turn and aerate, often faster a_composting process.
- Cons: Higher initial cost, batch composting (fill one, then let it process while you start another, or have a dual-chamber model).
- Worm Composting (Vermicomposting – Excellent for small spaces, even indoors!):
- How it works: Uses specific types of worms (like red wigglers) in a bin to break down food scraps. The worms eat the scraps and produce nutrient-rich castings.
- Pros: Odorless if managed correctly, can be done indoors (under sink, in a closet, balcony), produces very high-quality compost (worm castings).
- Cons: Requires purchasing worms, can’t process as large a volume as outdoor methods, certain foods should be avoided (citrus, onions, spicy foods in large quantities).
- Getting started: You’ll need a worm bin (DIY or purchased), bedding material (like shredded newspaper or coconut coir), and red wiggler worms. Add food scraps in small amounts.
- Bokashi Composting (Good for very small spaces, ferments food scraps):
- How it works: This is technically a fermentation process, not traditional composting. Kitchen scraps are layered in an airtight bucket with a special Bokashi bran (containing beneficial microbes). The fermented material then needs to be buried in soil or added to a traditional compost pile to fully break down.
- Pros: Can handle meat, dairy, and oily foods; compact and airtight (no odors during fermentation); quick initial processing.
- Cons: Requires purchasing Bokashi bran, the end product is pickled and needs further decomposition in soil.
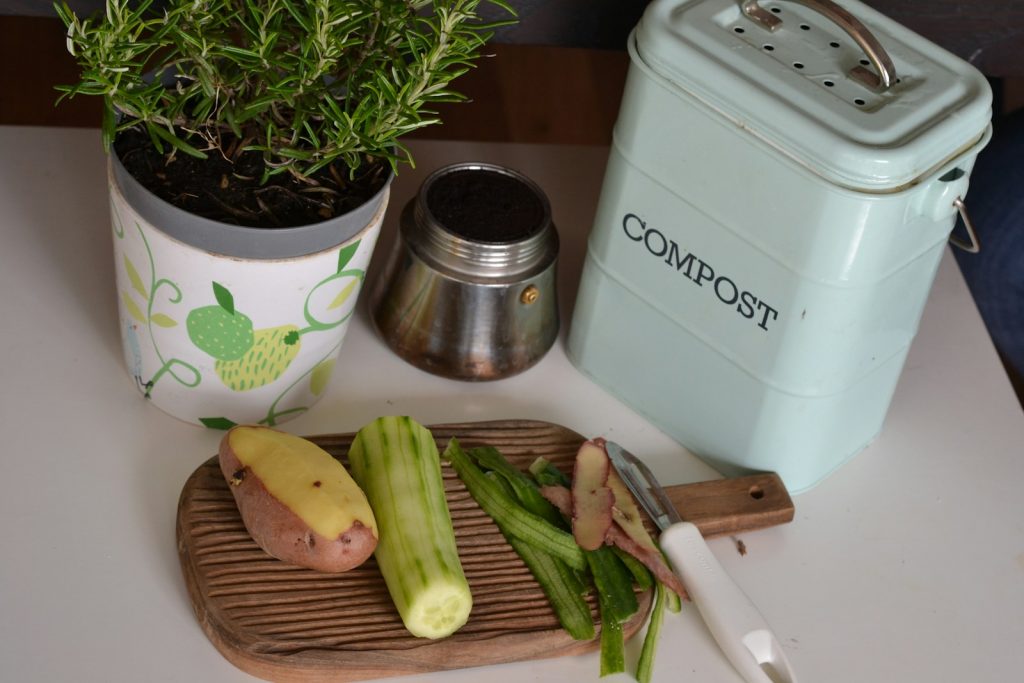
- Kitchen Compost Pail with Local Drop-off/Collection:
- How it works: Collect your kitchen scraps in a countertop pail (often with a charcoal filter to control odors). Then, take them to a local farmers market, community garden, or municipal composting facility that accepts food scraps.
- Pros: Very little effort or space required at home, supports community composting.
- Cons: Relies on available local services.
Tips for Successful Kitchen Composting:
- Chop it Up: Smaller pieces break down faster.
- Balance Greens & Browns: A common ratio is 2 parts brown to 1 part green by volume. Too much green can lead to a slimy, smelly pile. Too much brown will slow decomposition.
- Maintain Moisture: Your compost should be damp, like a wrung-out sponge. Add water if it’s too dry, or more browns if it’s too wet.
- Aerate: Turn your outdoor pile or tumbler regularly to provide oxygen, which speeds up decomposition and prevents odors. Worm bins need good airflow.
- Be Patient: Composting takes time, from a few months to a year, depending on the method and conditions.
- Keep a Lid on It (for outdoor bins): This helps retain moisture and heat, and deters pests.
- Use a Countertop Compost Pail: A small, lidded container in your kitchen makes collecting scraps convenient before transferring them to your main composting system.
Starting your composting for beginners kitchen journey is a hugely positive step towards a more sustainable lifestyle. Don’t be afraid to experiment and find what works best for you and your space. Every scrap you divert from the landfill makes a difference!
(For more ideas on managing food waste before it even gets to the compost stage, see our upcoming article: “Smart Meal Planning: How to Stop Food Waste in Your Kitchen”.)